Feeds:
Posts
Comments

We are so lucky in Boulder to enjoy one of the best Farmer’s Markets in the country.
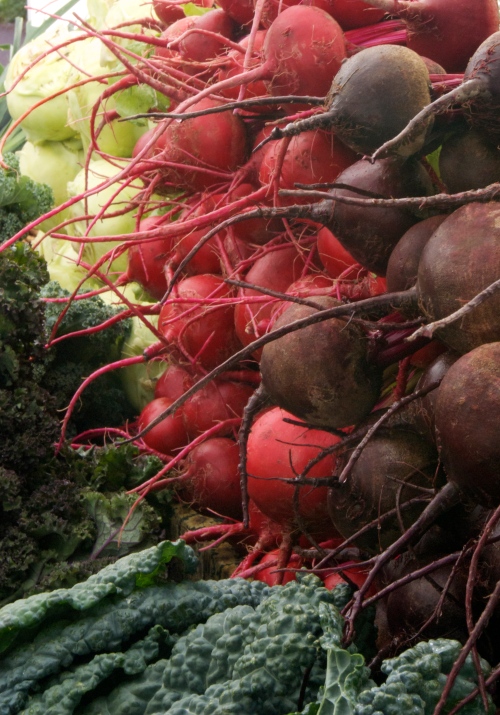
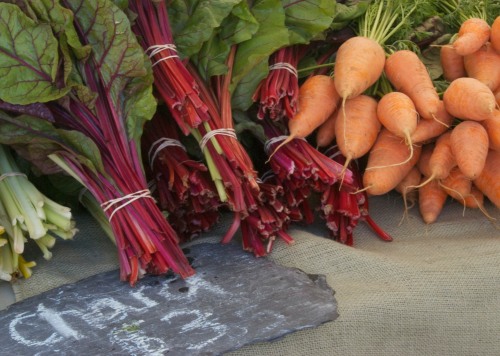
Visiting the market on a Saturday morning is one of my favorite ways to start the weekend. I love the visual splendor of the vegetables, the aromas of the food vendors, the hustle and bustle of the crowd. It is a truly iconic Boulder scene. People have their dogs, their bikes, their kids, their coffees, and their cloth bags. As I pass by, I like to catch snippets of conversations about organic this, tri-athalon that, gluten-free something else. I always stop by and say “hey” to Howie at the Brillig Works booth, who shares my passion for baking (and makes an awesome cinnamon roll). I swing by Shamane’s and eye their pies. Lately, I’ve taken a fancy to the clever marriage of flavor and purpose in the cupcakes sold by Street Fare (to benefit the Boulder Shelter for the Homeless). And I love to make a lunch of veggie dumplings from Sisters Pantry, or some masa yumminess from Tres Pupusas.

One of my favorite ways to enjoy the market is with camera in hand, just sampling with my eyes and taking in the visual delights.  Late in the season, peaches are the darlings of the market, with people lined up early for their bag or their box.  But the thing that catches me this morning is the unmistakable aroma of roasting chiles.
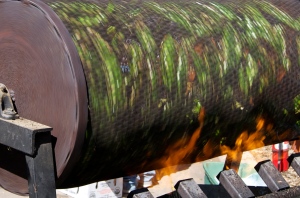
If you’ve never seen this contraption, you may not know the joys of fresh roasted New Mexico-style chiles.  The roaster is a metal mesh cylinder that is filled with peppers, turned by a crank, while gas burners shoot flames to blister the skins and cook the meat of the vegetable just enough.  Then, the peppers are packaged in plastic bags to steam. Shoppers at the market eagerly scoop these up.  Once home, the skins come off easily, and the roasted chiles get used for all sorts of  delicious recipes.

Green chiles can be used to flavor your morning scrambled eggs, give a little kick to your burger, or liven up some corn chowder.  But when you want a whole heap of chile flavor, nothing beats this pork green chile from local chef Lyle Davis.

New Mexican Green Chile, Davis Family Style

Serves 8 hearty appetites

Ingredients:

4 to 4 1/2 pounds natural pork butt or pork shoulder (country-style spare ribs can be used in a pinch), cut into cubes

2 cups unbleached flour

1 tsp black pepper

1 1/2 pounds whole, fresh roasted green chiles (don’t even THINK of using canned!)

3 large onions, chopped

4 cloves garlic, minced

1/3 cup olive oil

8 cups chicken stock

2 cups canned, whole peeled tomatoes, coarsely chopped

2 tsp salt (or to taste)

1 cup fresh cilantro leaves, chopped

Directions:

Trim the pork of fat and set one to two large 3-4 inch pieces of white pork fat aside to use later.  Cut pork into 1-inch cubes. Place flour, salt and black pepper in a bag and mix well.  Add the cubes of pork. Holding the bag closed tight, shake the pork cubes until meat is well-coated.

Heat olive oil over medium-high heat in large stockpot. Add chopped onions and garlic and cook for 10 minutes, stirring frequently, until onion is browned slightly.

Add dredged pork cubes, the reserved two pieces of pork fat and stir with onion and garlic.  Allow pork to brown, cooking for up to 15 to 20 minutes. turning frequently, until pork is seared on all sides and bottom of pan has a nice amount of brown bits on it.  (This caramelized brown stuff is called the “fond,” and it is what gives meat stews and sauces their incredible deep rich flavor.)

Remove cooked large pieces of fat and discard.

Add chicken stock, green chile (about 1 1/4 to 1 1/2 cups of chopped chile) and chopped canned tomatoes.  With wooden spoon, gently scrape bottom and sides of pan to help flavor the stock. With no lid on stockpot, allow chile to come to a boil and then reduce heat to a light simmer. Continue simmering for 1 to 1 1/2 hours, or until pork is tender. Salt to taste. The green chile should be rich and brown in color.

Optional: Just before serving add fresh cilantro to chile.

Serving suggestion: Serve in a bowl with fresh cilantro, shredded cabbage, and thinly sliced radishes and offer Oaxacan-style string cheese. Serve with hot, fresh corn tortillas. Or, pour to cover a dinner plate and top with two fried eggs, serve cooked pinto beans on the side with several types of salsa.

Source: Sylvia Tawse and Lyle Davis
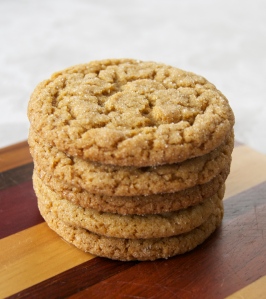
Ginger Molasses Crinkle Cookies

Life gets too busy sometimes. Mine got so busy that I dropped writing this blog. Perhaps you noticed.

I stopped posting because I fell into a food rut. Does that ever happen to you? I just got bored with my own cooking.

I think of this place as a way to share favorite recipes with you, my friends and family. It’s my on-line cookbook, in a way. However, when I wasn’t excited about cooking, I wasn’t inspired to share.

But I was moved the other day to make these cookies for my great Girl Scout co-leaders, Geri, Ginger, Jen and Cate. The weather turned a bit cooler, and that put me in the mood for these warm sweet and spicy gems. My friends deserve a little love, which is what these taste like.

Afterwards  they clamored for the recipe, so I dusted off my tripod and my blog to share it with all of you.  Thanks for the inspiration, gals!

Ginger Molasses Crinkle Cookies

Adapted from a recipe at Rev. Taylor’s Country Restaurant, formerly of Niwot, Colorado

Ingredients:

1 ½ cups butter, softened
2 cups granulated sugar (plus more for rolling)
½ cup Grandma’s molasses
2 eggs
4 cups all-purpose flour
½ tsp salt
2 tsp baking soda
2 tsp ground ginger
2 tsp ground cinnamon
2 tsp ground cloves

Directions:
Preheat oven to 350 degrees F.
Combine flour, salt, soda and spices in medium bowl. Set aside.
Cream butter and sugar until light and fluffy (three minutes with a stand mixer should do it). Add molasses and continue to mix. Scrape bowl. Add eggs and mix well. Scrape bowl. Add remaining ingredients and mix until blended.
Place a cup or so of sugar into a shallow bowl or plate.
Roll dough into balls approximately 1 ¼ inch in diameter (I use a little cookie scoop for this, but it’s not necessary). Place each ball into the sugar and toss gently to coat.
Place dough balls on cookie sheet that either has been greased or lined with parchment paper.
Bake for 10-12 minutes. Top should appear crinkly and cookie will be slightly browned. Let cool on sheets for 3-5 minutes before removing to cooling rack.
A batch this size makes about 80 cookies, about 2 ½ inches in diameter.

These cookies keep well and make great gifts!

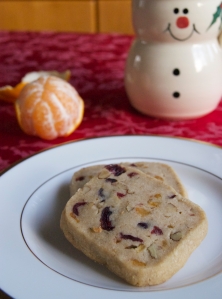
This cookie is relatively new to my holiday repertoire, and quickly has become a favorite. It is packed full of great winter flavors: cranberry, citrus, toasted pecans and maple syrup. It is super easy to put together and have in the refrigerator or freezer for those times when you suddenly need fresh-baked cookies on short notice (something that seems to happen often this time of year). And finally, I love that the dough is not overly sweet.

With all that fruit and nut goodness, and some whole wheat flour thrown in, I can almost convince myself that these are good for me.

Cranberry Orange Pecan Shortbread

Adapted from Whole Foods Market

Makes 32 cookies

Ingredients:

1 1/2 cups (3 sticks) unsalted butter, softened

1/2 cup sugar

1/4 cup maple syrup

1 tsp vanilla extract

2 cups all-purpose flour

1 cup whole wheat flour

1/2 tsp salt

3/4 cup dried cranberries

1/4 cup candied orange peel, diced

1 cup pecan pieces, toasted and chopped

Directions:

In an electric mixer, cream together butter, sugar and maple syrup until light and fluffy, about 3-5 minutes. Add the vanilla and mix to combine. Add flour and salt, one cup at a time, mixing well after each cup is added. Stir in the cranberries, orange peel, and pecans.

Shape dough into two logs and chill until firm, 1 to 2 hours.

Preheat oven to 350° F.

Line a baking sheet with parchment paper. Cut dough into 1/2-inch slices and arrange on baking sheet. Bake for 18 minutes, until lightly browned. Transfer cookies to a cooling rack. Cookies will keep several weeks in an airtight container.

Almond Crescents

I’m often tempted at the holidays to bake elaborately decorated or fancy cookies. And they undoubtedly have their charms.  But, sometimes, simpler is better.

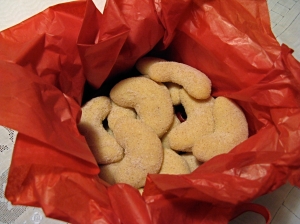
Nothing could be more perfect in its unassuming splendor as these almond crescents. They look like nothing special, but then you bite in, and the cinnamon sugar yields to the tender butter crumb, and then that yields to the subtle flavor of ground almonds.  And then it’s gone, and you find yourself reaching for another, thinking, “well, that was so small, surely one more won’t hurt,” and before you know it you’ve polished off a dozen and wonder what happened.  A couple dozen of these, wrapped in red tissue paper makes a gorgeous gift for someone you really love.

Almond Crescents

Adapted from Rose’s Christmas Cookies

Makes about 3 dozen crescents

Ingredients:

Cookie dough:

2 ounces (about 2/3 cup) blanched slivered almonds

1/3 cup sugar

1 cup unsalted butter

1 2/3 cup all- purpose flour

Topping:

1/2 cup sugar

1/2 tsp ground cinnamon

Directions:

In a food processor fitted with a metal blade, grind the almonds and sugar together until the almonds are very fine. Add the butter a couple tablespoons at a time, with the motor still running, and process until smooth and creamy.  Add the flour and salt, and scrape the sides of the bowl.  Pulse the processor a few times, just until the flour is incorporated.

Scrape the dough into a bowl, and cover with plastic.  Refrigerate for two hours or until firm.

Preheat oven to 325 degrees F.

Roll a piece of dough into a ball less than an inch in diameter.  Roll it between your palms, until it is in the shape of a cylinder, with slightly tapered ends on both sides, about 3 inches long by 1/2 inch thick. Form each cookie into a crescent shape and place on an ungreased cookie sheet, about an inch apart.

Bake 14-16 minutes, or until set but not brown. Cool the cookies on the baking sheet for a few minutes, then transfer them while warm into a bowl of cinnamon sugar (see topping, above), turning gently to coat thoroughly, one at a time.

Keep in an airtight container for up to one month.

Gingerbread People

Certain cookies are iconic at this time of year, but they often don’t taste as good as they look.  Thankfully, these are the perfect gingerbread cookies — adorable, spicy, a tad chewy, and utterly delicious.  I make them every year, and people always say they are the best gingerbread cookies they’ve ever had.

Once again, my reputation as a baker rests on the shoulders of Rose Levy Berenbaum.  Her book, Rose’s Christmas Cookies, should be on the shelf of everyone who bakes cookies at the holidays.

Gingerbread People

adapted from Rose’s Christmas Cookies

Makes about 40 small or 25 large gingerbread people

Ingredients:

3 cups all-purpose flour

1/4 tsp salt

1 tsp baking soda

2 tsp ground ginger

1 tsp ground cinnamon

1/2 tsp grated nutmeg

1/4 tsp ground cloves

3/4 cup firmly packed brown sugar

12 Tbsp. unsalted butter, softened

1/2 cup Grandma’s molasses (unsulphured)

1 egg

Royal Icing, for decorating

Directions:

Mix together the flour, salt, baking soda and spices in a small bowl.  In a separate bowl, cream together the brown sugar and butter until fluffy (about 3-5 minutes using a stand mixer). Add the molasses and egg and beat until blended. On low speed, add the dry ingredients until well blended.

Scrape the dough out of the bowl and onto a sheet of plastic wrap.  Form into a flat-ish disc or rectangle. Wrap tightly and chill in the refrigerator for a couple of hours, or overnight, if necessary.

Preheat oven to 350 degrees F.

Roll out the dough on a lightly floured surface, to about 1/8 inch thickness or so.  If the dough is very cold, you may need to let it warm a bit on the counter before you begin to roll it out. Cut out the dough with cookie cutters in the shape of people, large or small.  Place the shapes on a piece of baking parchment or a lightly greased cookie sheet, leaving an inch or so between them.  Bake for 8-10 minutes for the small cookies, a couple minutes longer for the large ones.  Cookies will not color appreciably in baking, so look for them to rise a bit in the center, and be just starting to firm up.

Cool the cookies on the baking sheets for a few minutes, then transfer to wire cooling racks.  Decorate with royal icing (or melted white chocolate).

These cookies keep for months, stored in an airtight container, making them the perfect cookie to make early in your holiday season.

Soft Pretzels

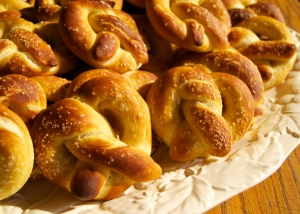
I’ve had this post in draft form for more than a week, waiting for inspiration to strike.  I have come up with nothing profound to say about these soft, chewy, salty knots of pleasure, except they are delicious, remarkably easy, and were a huge hit at Morgan’s class Halloween party.  That’s all I got.  Hope you’ll try them.

Soft Pretzels

Adapted from Alton Brown

Ingredients:

1½ cups warm water (110-115° F)
1 tbsp. sugar
2 tsp. kosher salt
2¼ tsp. instant yeast
22 oz. all-purpose flour (about 4½ cups)
4 Tbsp. melted butter*

—–

Cooking spray
10 cups water
2/3 cup baking soda
1 egg yolk beaten with 1 tbsp. water*
Pretzel (or kosher) salt

Directions:
Combine 1 1/2 cups warm water, sugar, salt and yeast in the bowl of a stand mixer fitted with a dough hook.  Mix on low speed (or just use a spoon) to dissolve the yeast.  Add in the flour and melted butter and mix just until the dough comes together. Knead on medium speed until the dough is smooth and clears the sides of the bowl, about 5 minutes.  Transfer the dough to a bowl lightly sprayed with Pam or other cooking spray, turning once to coat.  Cover with plastic wrap or a damp clean kitchen towel and let rise in a warm place, about 50-55 minutes or until doubled in bulk.

Preheat the oven to 450° F.  Line two baking sheets with parchment paper and spray lightly with cooking spray. Bring the water and baking soda to a boil in a large wide saucepan or skillet.  In the meantime, divide the dough into 8 equal pieces for large pretzels, or 16 pieces for smaller pretzels (perfect for kids).  I found that the large pretzels weighed about 4 oz. each, the small ones, half of that. Working with one piece at a time, roll a segment out into a 24-inch long rope (12 inches for the small ones).  Make a U-shape with the rope and holding the ends of the rope, cross them over each other and onto the bottom of the U-shape in order to form the shape of a pretzel. Place onto the parchment lined baking sheet.  Repeat with the remaining pieces of dough.

Place the pretzels into the boiling water, 1 or 2 at a time, for 30 seconds.  Remove from the water with a slotted skimmer, drain well before returning to the baking sheet.  Once all the pretzels have been boiled, brush the tops with the egg wash (if using) and sprinkle lightly with salt.  Bake in the preheated oven until dark golden brown, about 12-14 minutes.  Transfer to a cooling rack for at least 5 minutes before serving.

* I made these pretzels in vegan form, due to some extreme allergies among Morgan’s classmates.  I substituted Earth Balance vegan spread for butter, and omitted the egg wash.  The results were very good, and the vegan dairy-free version was nearly as delicious and beautiful as the original recipe.

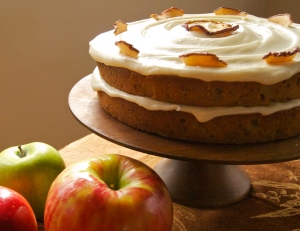
I guess I’m on an apple tear. I made this dessert for a dinner party recently, where chicken with Moroccan spices was the main course. I wanted something to complement the warm notes of that dish, and be also appropriately seasonal. I found Dorie Greenspan’s recipe for a not-too-sweet Fuji Apple Spice cake, and adapted it for this occasion.  The original made two very high layers.  I prefer thinner layers, and didn’t need that much cake. So I divided the batter into three layers, and baked them all, but set aside one and froze it for later. The two layer apple cake, pictured here, fed eight for dessert, with leftovers. The cake is moist and dense, studded with chunks of apples and chopped pecans, and the frosting is rich and creamy.  A small slice is plenty for most people. Luckily, the cake improves with a little age, as the flavors meld and the cakes get even more moist. This is a good cake to make a day ahead.

Two-layer Apple Spice Cake, with one for later:

Ingredients:

Cake:

3 cups all-purpose flour

1 3/4 tsp. ground cinnamon

1 1/2 tsp. baking powder (at high altitude, reduce to 1 tsp.)

1/2 tsp. salt

1/2 tsp. ground allspice

1/4 tsp. freshly grated nutmeg

1/4 tsp. baking soda

1 cup unsalted butter, room temperature

1 1/4 cups sugar

3/4 cup (packed) brown sugar

3 large eggs

2 tsp. vanilla extract

2 Tbsp. bourbon, apple brandy, or rum (optional)

1 1/2 cups applesauce, unsweetened

2 medium apples (Fuji or Gala, about 13 or 14 ounces total), peeled, and diced into 1/2-inch cubes

1 1/2 cups finely chopped pecans (about 6 oz.)

Frosting:

1 8-ounce package cream cheese (or neufchatel cheese), room temperature

1/2 cup butter, unsalted, room temperature

1 Tbsp. vanilla extract

Pinch of salt

3 cups powdered sugar, sifted

Coarsely chopped toasted pecans or dried apple slices (for garnish)

Directions:

Cake:

Position rack in center of oven and preheat to 350°F. Butter and flour three 9-inch-diameter cake pans. Line bottom of each pan with parchment paper round. Whisk first 7 ingredients in medium bowl. Using electric mixer, beat 1 cup butter in large bowl until fluffy. Add both sugars and beat until smooth. Add eggs 1 at a time, beating well after each addition. Beat in vanilla, then bourbon, if desired (mixture may look curdled). Add flour mixture to egg mixture in 3 additions alternately with applesauce in 2 additions, beating until blended after each addition. Stir in apples and pecans. Divide batter between cake pans; smooth tops.

Bake cakes until tester inserted into center of each comes out clean, about 40- 45 minutes. Transfer cakes to racks and cool in pans 15 minutes. Cut around pan sides to loosen cakes. Invert cakes onto racks; peel off parchment paper. Place another rack atop 1 cake and invert again so that cake is rounded side up. Repeat with other cake layers. Cool completely. At this point, you can wrap each cake in plastic and store at room temperature, or freeze for later use.

Frosting:

Using electric mixer, beat cream cheese and butter in large bowl until smooth. Beat in vanilla extract and pinch of salt. Gradually add powdered sugar, beating until frosting is smooth and creamy.

Transfer first layer to platter. Drop half of frosting (about 11/2 cups) by spoonfuls atop cake. Spread frosting evenly to edges of cake. Top with second layer. Drop remaining frosting by spoonfuls onto top of cake, leaving sides of cake plain. Spread frosting to top edges of cake, swirling and creating peaks, if desired. Sprinkle with pecans or decorate with dried apple slices (pictured above). Let cake stand at room temperature 1 hour to allow frosting to set slightly.

Double-crusted Apple Pie

Now is the time for apples — crisp, juicy, glorious in their familiar, yet still sublime combination of sweet and tart. And what better way to celebrate them than baking a beautiful apple pie?

For this occasion, I chose a traditional double-crusted, deep dish apple pie. For this to work, the apples need to be flavorful and hold their shape while still being juicy, and the crust needs to be crisp and flaky.

Folks are often intimidated by making pie crust, these days. We’ve lost so much of our accumulated culinary knowledge in the home. We’ve forgotten what it means to be a good cook, and instead revere the celebrity chefs on our televisions. We have huge kitchens with cherry cabinets, stainless steel appliances and 6 burner stoves which too often are used just for heating up take-out food.

Pie crusts don’t require a degree from culinary school.  Generations of women (and it was mostly women) have rolled out pie crusts many times a week, without a recipe and in kitchens the size of my closet. Flaky pie crust is the result of adhering to a few guidelines, and then practicing enough so you get comfortable with the technique.

Keep your cool. Flaky crusts come from fats (butter, in this case) staying cold, and not coating the proteins in the flour. To keep that from happening, recipes often advise cooks to refrigerate their ingredients, even chill their bowls and utensils.  It’s best to make pie on a cool day, rather than in the heat of the summer.

Work quickly. This prevents the dough from warming up (see above) and prevents overworking the dough (see below).

Don’t overwork the dough. Gluten is a protein in wheat flour that creates long strands when stirred or kneaded.  This is wonderful when you are making pizza dough or baking bread, but it is anathema to tender pastry.

There’s not much more to it, honestly.  Details follow below. Don’t be intimidated, give it a try.

Double-crusted Apple Pie

Ingredients:

Filling:

8 apples,* peeled and sliced

Juice and zest of 1/2 lemon

1 tsp. vanilla extract

3/4 cup sugar

1/4 tsp. cinnamon

1/4 cup flour

Dash of freshly grated nutmeg

2 Tbsp. water

2 Tbsp. melted butter

* I suggest a mixture of apples, some tart and some sweet.  Choose varieties that hold their shape during baking. For this pie, I used Granny Smiths, Jonathans, and Golden Delicious. If you have access to an apple orchard or farmer’s market, you may find varieties not sold in normal supermarkets.  Ask the farmer about these — some heirloom varieties make the very best pies!

Crust:

14 Tbsp. (7 ounces) unsalted butter, cold

2 1/4 cup all-purpose flour

1/4 tsp. salt

1/4 tsp. baking powder

6 Tbsp. ice water

1 Tbsp. apple cider vinegar

Directions:

Cut the butter into little cubes (about 1/2″ ). Set aside approximately two-thirds of the butter, wrap loosely in plastic wrap, and put it in the refrigerator for at least a half hour. Wrap the remaining butter, and put it in the freezer. Combine the flour, salt and baking powder in a large Ziploc bag and put it in the freezer for about half an hour, as well.

Place the flour mixture in the food processor fitted with the metal blade and process for a few seconds to combine. Add the butter from the fridge (the larger portion) and pulse until the mixture resembles coarse meal, about 10-20 seconds. Add the remaining frozen butter cubes and pulse until the cubes are about the size of pease.

Add the ice water and vinegar and pulse five or six times. The dough will not “come together,” but you will be able to pinch it and have it hold together. Dump the crumbly mixture into a large Ziploc bag (you can use the same one from before). Close the bag, forcing any extra air out. Quickly knead the dough into a flat ball. Divide into two discs, and wrap each in plastic wrap. Refrigerate for 45 minutes or longer.

While the dough is chilling, prepare the filling.

Peel and slice the apples, tossing them with the lemon juice to discourage browning. Combine the remaining ingredients, except the butter.  Gently mix with the apples, tossing gently to coat.

Roll out one disc at a time, keeping the other cool in the refrigerator while you work.

On a lightly floured surface, or between two sheets of plastic wrap, if you prefer, roll out the first disc of dough to approximately 12″ in diameter.  Place the dough in the 9″ pie pan, and put it in the refrigerator while you roll out the upper crust to the same size.

Fill the bottom crust with the apples. Since the apples will shrink some in cooking, I find it best to take the time to layer the apples in the crust, leaving the least amount of space possible. The filling will be mounded over the height of the pan to some extent.  Do not worry about this, it is normal.

Drizzle the melted butter over the filling, and place the top crust over the whole thing. Fold the top crust edge over the bottom crust edge, and press together to make a ridge all the way around the pie. Crimp in any design you like. I usually make a zigzag by pushing the dough between my thumb and forefinger on my left hand, and the thumb of my right hand. But you can use a fork, or make any sort of design that encourages the two crusts to bond together and hold in the juices. Be creative.

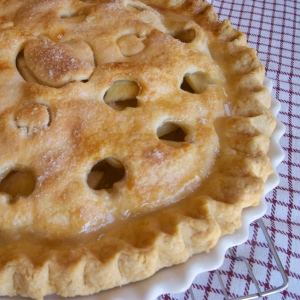
Cut slits in the top to let steam escape. In the pie pictured above, I used a fancy device my Aunt Dusty gave me, that made a cute apple design. But you don’t need one to make a perfectly good-looking pie.

Brush the top with an egg white and sprinkle liberally with sugar.

Put the pie on a baking sheet, lined with foil to catch the inevitable drips and spills. Bake at 375 degrees for approximately one hour, or until the top is golden and the juices are bubbling.

Pumpkin Problems Persist

Consider this a public service announcement from your friendly neighborhood food blogger.

It’s fall (at least according to the calendar) and bakers’ minds turn to things like apple pie and pumpkin bread.  Yesterday, I went to make some pumpkin muffins and a loaf of pumpkin bread to go with some soup I’d made for dinner.  When I opened the (two) cans of Libby’s pumpkin, I noticed that they were a little lighter and a little thinner in consistency than usual.  But, honestly, it’d been a while since I’d made anything with pumpkin, so I overlooked the variation and proceeded with the recipe.  This recipe is one I’ve made 100 times, if I’ve made it once.  It’s been my “go to” pumpkin bread recipe for 15 years. It’s the very definition of “tried and true.”

So, imagine my shock and disappointment when the muffins and the bread turned out pale and flat, the texture heavy to the point of almost being gummy.

I did a little research.  I found out that almost all pumpkins that are destined to be canned are grown within 100 miles of Peoria, Illinois.  Which is great, unless you have a freak weather problem in Peoria. Then you and everyone else who wants to make pumpkin pies for Thanksgiving are going to be out of luck! You may know that last year’s pumpkin crop was a loss, because the fields were so wet at harvest time that tractors were up to their axles in mud.  Pumpkins apparently like it hot and dry.

Stores ran out and there has been such a shortage of canned pumpkin that cans were reportedly being sold on eBay for $30 apiece!  Early reports from this year’s harvest were cautiously encouraging.  But the weather reports showed that the season was wet at first, and the early harvest may have been affected.  In addition, there is some concern over the crop being vulnerable to blight, due to all the moisture these past two or three years.

In any case, I called the people at Libby’s to report my pumpkin problem.  They were very nice on the phone, I must say, and took my information, promising to send me a coupon to replace the inferior cans.  While the nice lady on the phone said they hadn’t had any reports of problems with this year’s crop, I hung up with a feeling of uncertainty.  Was I getting the straight story, or was this PR on the company’s part?  Or perhaps they just didn’t know that they did have a problem?  I might have been one of the first consumers to bake with the canned pumpkin.  Maybe I was the canary in the coal mine. She informed me that the cans I used were filled two months ago (which means late July or early August, an early crop).  From my reading, that means they were growing when the fields in Illinois were pretty wet, still.  Her hypothesis was that the cans were frozen in transit (on one of those refrigerated trucks), which can cause the pumpkin to turn watery, I guess.  But that wouldn’t explain the pale color, in my opinion.

Anyway, I’m blogging about this because I want to spare you, dear readers, the heartache of flat, gummy muffins.

What do I suggest?  Well, first, consider using local pumpkins (it’s surely been hot and dry here in Colorado!) and make your own pumpkin puree.  Secondly, consider baking something fall-like that doesn’t require pumpkin.  Maybe zucchini bread or apple tart or corn muffins (what I made last night).  If you do use canned pumpkin puree, I would drain it in some cheesecloth suspended over a bowl for an hour or two, to reduce the moisture.

Good luck, and let me know what you learn!!!

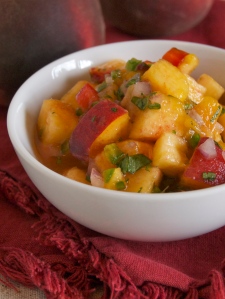
Peach Salsa

Did you know that Colorado has some of the best peaches in the country?  Farmers on the Western Slope (around Palisades) do a remarkable job of growing these sweet beauties and driving them across the Continental Divide to farmers’ markets all along the Front Range. I can’t imagine how many acres of trees must be needed just to supply the hordes of shoppers in Boulder, alone.  People line up a half hour before the farmers’ market opens on Saturday mornings, just to be sure to get a bag or a 20 lb. box (I once saw someone buy four boxes!) before they sell out. They’re that good.

We are on the tail end of peach season here, but you can still find some stragglers at the market.  After you’ve had your fill of peach pie and peach cobbler, and you’ve had diced peaches on your morning cereal every day for a month, it’s time to branch out.  This salsa has that sweet heat that I find so perfect on grilled meats, or just scooped up with copious amounts of chips.  It would be awesome on fish tacos.

Remember, you can adjust the heat or the sweet by adding more or less of the following ingredients…

Peach Salsa

Ingredients:

3  cups  diced peeled peaches (about 2 pounds)

1/4  cup  diced red onion

1/2 red bell pepper, diced fine

2-4  Tbsp  finely chopped fresh cilantro

1 seeded jalapeño pepper, minced (or less, to taste)

2  tablespoons vinegar (rice vinegar or white balsamic or white wine vinegar make good choices)

Juice of half of a lime

Honey to taste

Directions:

Combine all ingredients gently.  Best served the day it is made.